


Curved Flashings
StratcoSKU: Curved-Flashings
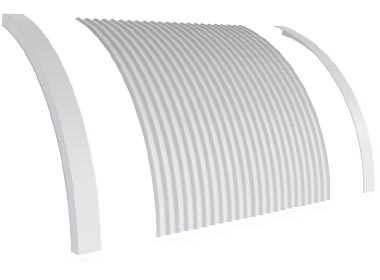
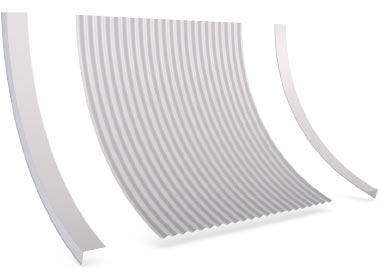
Standard or custom curved flashings are available from Stratco to suit a wide range of applications. Standard flashings are available in pre-painted colour steel, zinc/al, and galvanised finish. Custom flashings are available in a wide range of materials, lengths and thicknesses. Whether you want to install it yourself or require assistance, we are here to help. Contact us for pricing and further details today.Image gallery


Brochures & Installation Guides
Curved Flashing Profiles
- Curved Apron
- Convex Curved Barge
- Concave Curved Barge
- Curved Barge - Part Curve
- Curved Parapet
- Curved Barrel Vault Barge
- Curved Box Gutter
- Curved Corner
- OG Curved
Curved Apron
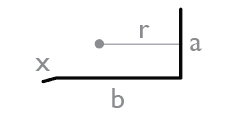
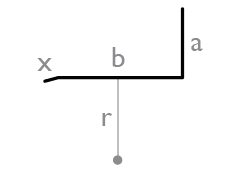
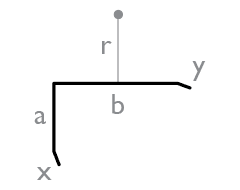
1. Nominate Face (a), Tail (b) and Break (x) dimensions. (Note: Maximum break (x) = 10mm).
2. Nominate flashing type and Radius (r).
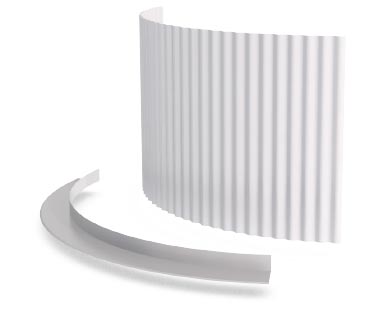
TYPE 1
Curved Apron - External

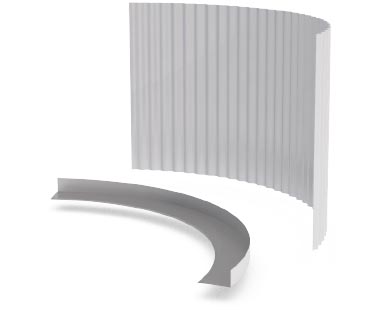
TYPE 2
Curved Apron - Internal
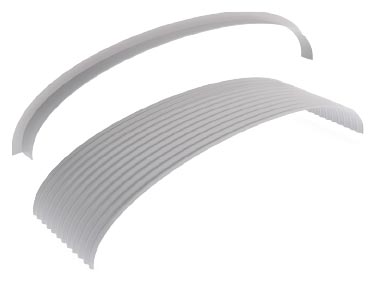
TYPE 3
Curved Apron - Arch
TYPE 4
Curved Apron - Reverse Arch


Convex Curved Barge - With Straight
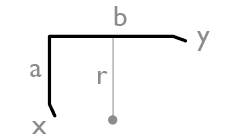
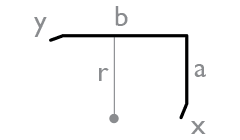
1. Nominate Face (a), Tail (b) and Break (x) and (y) dimensions. (Note: Maximum break (x) and (y) = 10mm).
2. Nominate the straight length.
3. Nominate flashing type and Radius (r).
TYPE 5
Convex Barge - Left Hand

TYPE 6
Convex Barge - Right Hand

Concave Curved Barge - With Straight
1. Nominate Face (a), Tail (b) and Break (x) and (y) dimensions. (Note: Maximum break (x) and (y) = 10mm).
2. Nominate flashing type and Radius (r).
TYPE 7
Concave Barge - Left Hand
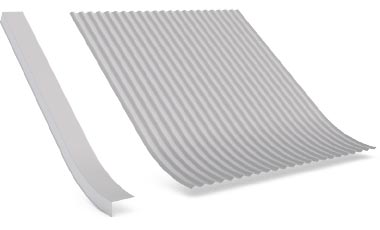
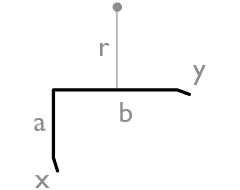
TYPE 8
Concave Barge - Right Hand

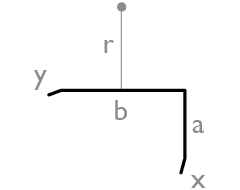
Curved Barge - Part Curve
1. Nominate Face (a), Tail (b) and Break (x) and (y) dimensions. (Note: Maximum break (x) and (y) = 10mm).
2. Nominate flashing type and Radius (r).
TYPE 9
Convex Barge - Arch
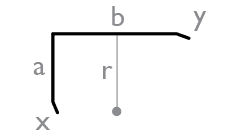
TYPE 10
Concave Barge - Reverse Arch
Curved Parapet
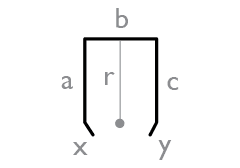
1. Nominate Sides (a) and (c), Head (b) and Break (x) and (y) dimensions. (Note: Maximum break (x) and (y) = 10mm).
2. Nominate flashing type and Radius (r).
TYPE 11
Curved Parapet


TYPE 12
Curved Parapet - Arch

Curved Barrel Vault Barge - Full Curve
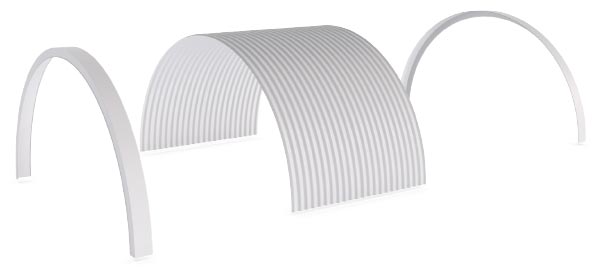
1. Nominate Face (a), Tail (b) and Break (x) and (y) dimensions. (Note: Maximum break (x) and (y) = 10mm).
2. Nominate flashing type and Radius (r).
TYPE 13
Barrel Vault Barge - Arch
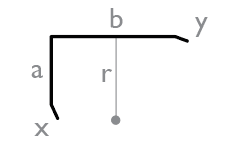
Curved Box Gutter
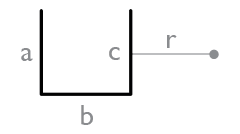
1. Nominate Face (a), Tail (b) and Break (x) and (y) dimensions. (Note: Maximum break (x) and (y) = 10mm).
2. Nominate flashing type and Radius (r).
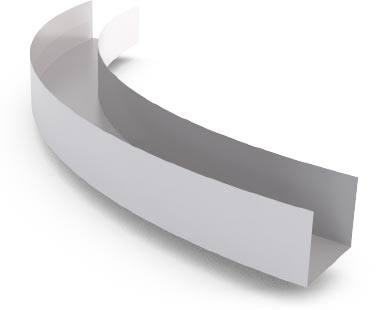
TYPE 14
Curved Box Gutter
Curved Corner
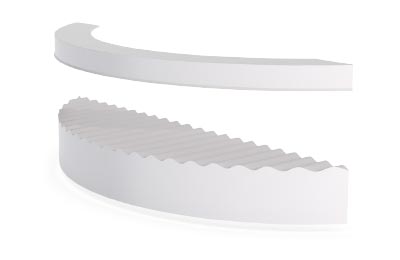
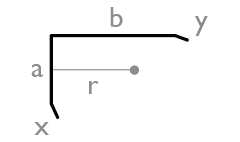
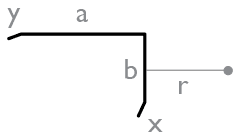
1. Nominate Face (a), Tail (b) and Break (x) and (y) dimensions. (Note: Maximum break (x) and (y) = 10mm).
2. Nominate flashing type and Radius (r).
TYPE 15
Curved Corner - External
TYPE 16
Curved Corner - Internal
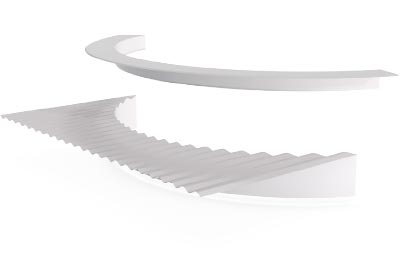
OG Curved
Contact Stratco for prices and ordering procedures on OG Curve Flashings.
OG Curved

Flashing Materials
Stratco curved flashings are available in unpainted zinc/al, pre-painted colour steel and galvanised finish. The table below shows the standard material specifications for curved flashings.
| Flashing Material Specifications | ||||
| Material | Base Metal Thickness (mm) | Max Width (mm) | Max Length (mm) | Max Radius (mm) |
|---|---|---|---|---|
| Galvanised | 0.55 | 500 | 6000 | 450 |
| Zinc/al | 0.55 | 500 | 6000 | 450 |
| Colour | 0.55 | 500 | 6000 | 450 |
As well as the standard materials specified above, Stratco may able to customise curved flashings to suit your material specifications. These custom flashings can be made in a range of materials, lengths and thicknesses.
Contact your local Stratco for more details on custom curved flashing specifications.
Receiving Orders
Stratco prefer to receive orders by fax or by Stratco Direct™. Stratco will accept, but take no responsibility for orders placed by phone.
Flashing Drawings
Standard Flashings
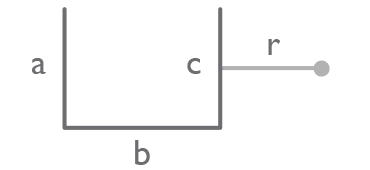
When drawing standard flashings, letters describe the dimensions of each plane on the flashing, 'r' describes the radius and numbers describe the included angle. You need to advise us of all dimensions, and identify any angle that is not 90 degrees.
Tapered Flashings
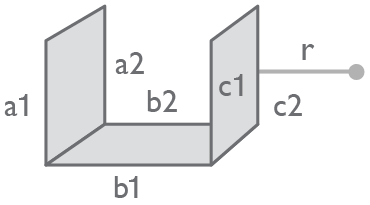
Tapered flashings use the same system as non-tapered flashings. The letter 'r' describes the radius. Angles will always be constant throughout the flashing. The dimensions closest to you, described as 'NEAR' have a '1' added to the letter representing the dimension, and the dimensions furthest away, described as 'FAR' have the number '2'. Curved box gutter would therefore be described as shown in the diagram on the right.
Order Methods
Clock Method For Placing Orders By Phone
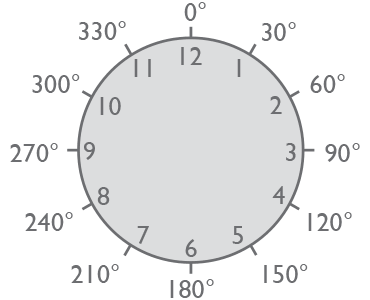
Commence at the centre of the clock. Draw a straight line from the centre to the number on the clock (1-12) at the required angle, representing the first line of your flashing drawing. Where the pen stops becomes the centre of the clock for the next line. Complete the flashing using this method. For tapered flashings quote nearest edges first. Repeat for the back (use the same letters) unless otherwise indicated.
Page Drawing Method

Begin drawing the flashing at the centre of the page. Describe the direction of the line as you draw it. Advise if the line moves vertically up or down the page, horizontally left or right, or to which page corner. Advise the length of the line. Do this for every line in the flashing. Advise of the radius and any included angles.
